 |
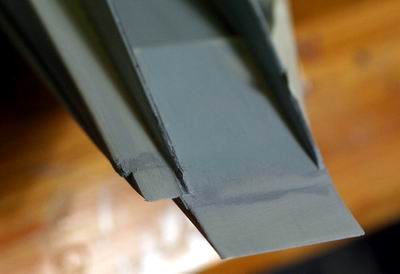
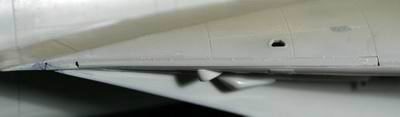
エアーインレットの継ぎ目は特に目立つので、パテできれいに消したい。 Clean this area as much as possible, since this area is so visible. |
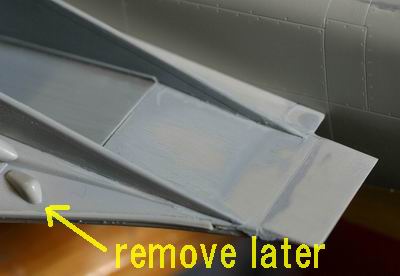 |
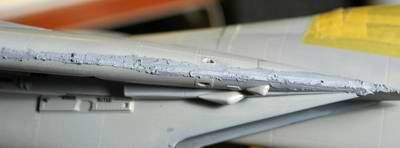
サンドペーパーでフィニッシュした状態。左下のアンテナはDタイプにはついていない事がわかり、切り取ることになった。 After sanding. I found that these 2 radars are not installed on D type. Must be removed . |
 |
切り取った後はパテで修正する。その代わりに前縁部にあるアンテナのふくらみをパテで再現する。 Cut them with small saw and then putty. There is another radar which is installed on the front side of the intake. I put some plastic sheet inside and then putty. |
 |
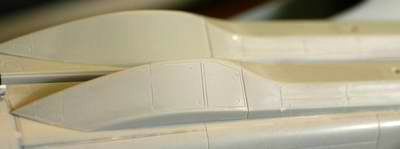
修正後の状態。 After sanding. |
 |
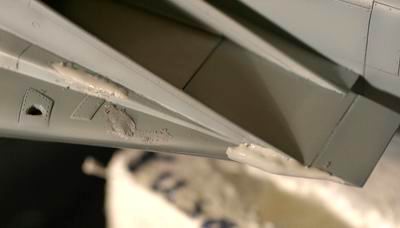
ここの修正には苦労した。写真のようにしか合わず、パテを刷り込み瞬間接着剤を流し込み、無理やり修正した。しかし後から知り、キャノピには応用したのだが、接着面に小さな穴を数箇所あけ、針金を差込み、両面を合わせるという技を使えばよかったと反省。 Here is the another big challenge of building this kit. There is a big step between nose and body. I put instant glue into the gap and then putty, and then sand off the step. However, I should use the same technique as for the canopy attaching, which is leveling both surfaces by putting pins inside the glue faces. |
 |
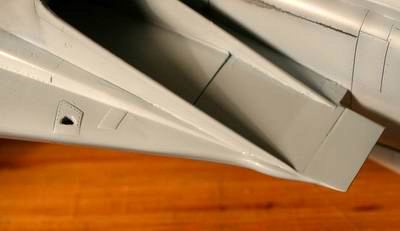
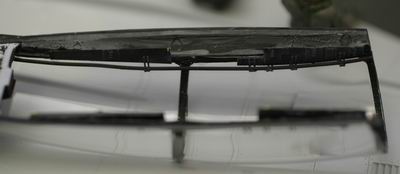
前の説明と同じ、サンディングで修正したのだが、針金矯正を行うべきであった。 Same as top side. I sand this big step off. It was a pain, wasn't it! I should put pins on the glue surface. |
 |
グローブバンはDタイプにはない。 There is no glove vane for D type. |
 |
パテをすり込み、サンドペーパーで消す。 Put putty into the gap and remove the lines. |
 |
ウエポンレールも凸ラインを修正、筋彫りを行う。 Sand raised lines off and scribe lines on the weapon rails. |
 |
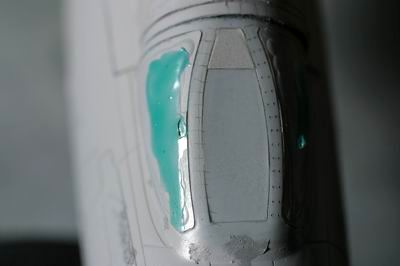
キャノピのディテールアップはTeknicsのエッチングを瞬間接着剤で固定する。気をつけなければならないのは、瞬間接着剤は透明パーツを白濁させるので、最小限の量で固定する。また、レジンコックピットがキャノピに干渉するのでキャノピのサイドをかなり薄く削った。 Glue Teknics etched parts to the canopy. Be careful that instant glue may cause whitening of clear parts. Use instant glue as little as possible. Shave the side of the canopy because it interferers with the Teknics resin cockpit parts. |
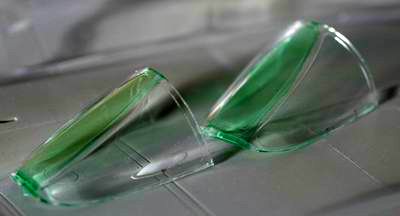 |
透明パーツへの着色はアクリル系、エナメル系といろいろ試したが、グンゼのラッカー系Mr.カラーのクリア色が一番きれいに塗れると思う。 I think using Mr. Color lacquer type clear paint will provide the best results for the clear parts. I used to paint acrylic or enamel before. |
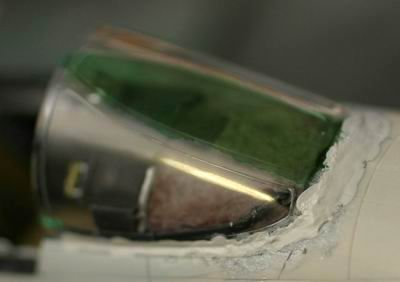 |
是非行いたいのが、キャノピ前部をボディーへ一体化させること。 Removing the gap between body and front cover will result in a very nice finish. |
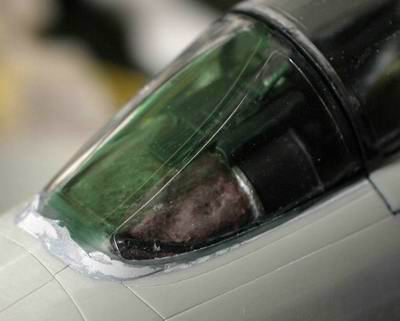 |
パテによる修正で一体感を形成する。 Put putty and sand very carefully. Try to avoid scratching clear area. |
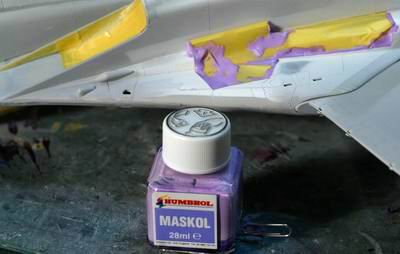 |
さて、ここまでできたらいよいよ塗装の開始である。車輪格納部やインテーク内側にスプレーが入らないようにマスキングする。複雑な形状のところはマスキングゾルを併用すると良い。 Now let's start painting! Mask inside bays and inlets by taping masking tapes and putting masking sol for the areas difficult for taping. |
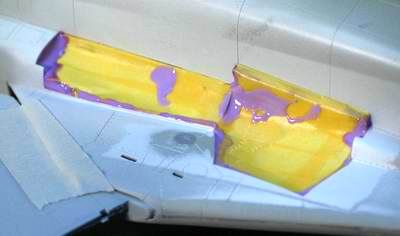 |
このように Like this. |
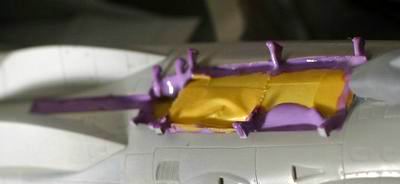 |
白い部分にマスキング。 Put sol for the white painted structures. |
 |
キャノピはエデュアルドのイージーマスキングを初めて使ってみたが、結果、二度と使わないことに決めた。隙間ができて塗料が入り込んでしまったのである。マスキングテープが一番! I used Eduard's masking materials for the first time. However, I should not use those, because there are many gaps and got overspray inside the seal. I think Tamiya's masking tapes is the best! |