 |
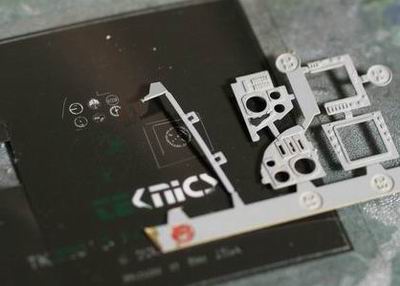
テクニクス社のコップピットは素晴らしいデテールである。まずはエッチング部品を瞬間接着剤で固定。 I began with aftermarket cockpit set. I am really impressed with the quality of the Teknics product. I glued the etched parts with instant glue. |
 |
その後はレジン用のプライマーをスプレーする。私が愛用しているのはクレオスのレジンプライマー。 Then, I sprayed resin primer. I always use Mr. Resin Primer from Creous. |
 |
私が一番嫌いなレジン部品の余白取り。製作者はどうしてもう少し気を使わないのであろうか?力もいるし、いつも指を削りそうになる。 And now to the most hated process for resin products; I need to shave off big chunks of excess resin. It's very hard and I almost always cut my finger. Why don't resin makers care more about this? |
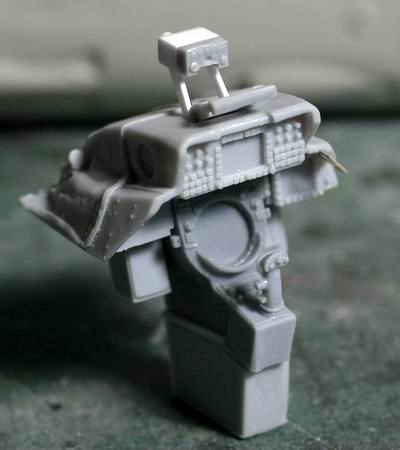 |
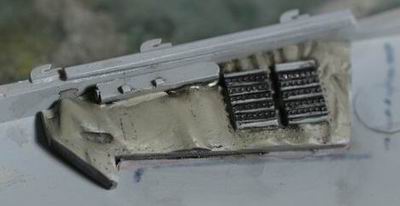
F-14Dのコックピットの写真を見て見つけた追加機器。白い部分をプラ材で自作。 I scratch-built this extra instrument panel for the cockpit out of plastic card, based on what I saw in tsome photos. |
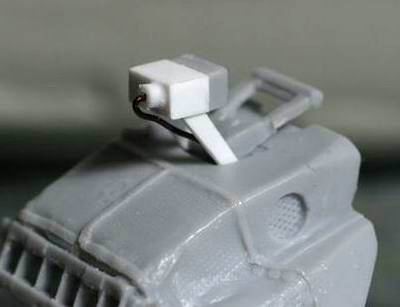 |
エナメル線でコードを追加。 View of the rear side. I have put in a piece of enamel wiring. |
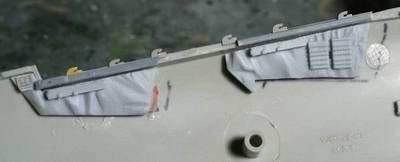 |
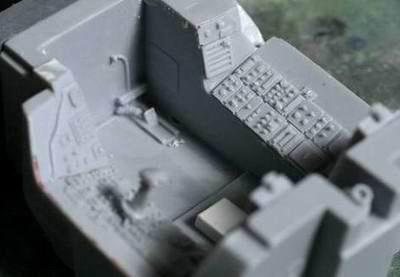
サイドの機器パネルは本体と合わせながら慎重に位置決めをする。削り取ることも必要。 I cut and adjust the side panels to fit the tight configuration. Then I attached them with instant glue. |
 |
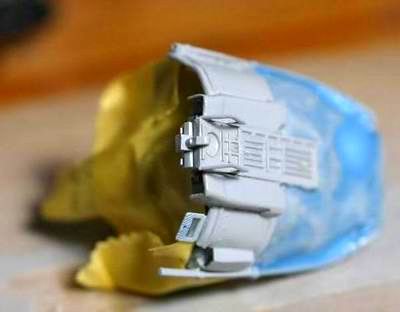
コックピットのあわせはとても苦労した。キットにうまく収まらず、かなりの部分を削り取った。 It is quite a difficult job to fit the resin cockpit into the fuselage. I needed to shave the side of cockpit booth considerably to get it to fit .inside the nose. |
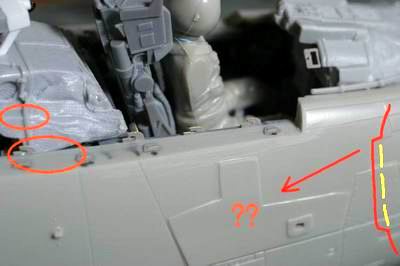 |
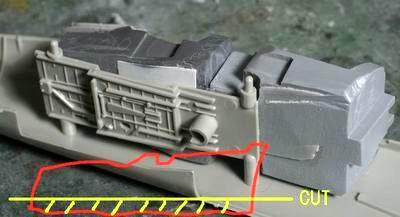
左の箇所がキャノピにあたるので削りこむ。また右の出っ張りは実機にはないので紙やすりで削る。 I cut off area shown circled in the left of the photo to avoid interfering with the canopy. I sanded off the area marked in the right of the photo until it was level. There is no raised panel like this on the actual aircraft. |
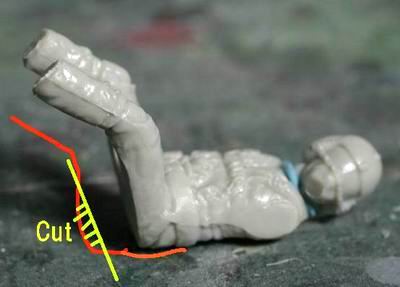 |
下の写真のようにシートにフィットするにはお尻がじゃまである。カットする。 I cut off the figure's butts to make them fit with the seat. |
 |
首と手の接着はまだ行わない。いずれも、後でつくるジオラマに仮設置して決定する。 Don't attach the head and arms to the figures until Tomcat has been set in the diorama. This is because I may need to adjust the positions to best show communication with the deck crew. |
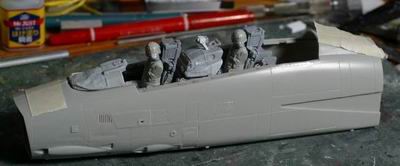 |
なんとか収まった。キャノピをかぶせてみて頭がぶつからないか確認。シートの高さも調整する。 There! Test assemble. At this point you need to adjust the height of the seat not to touch the roof of the canopy. |
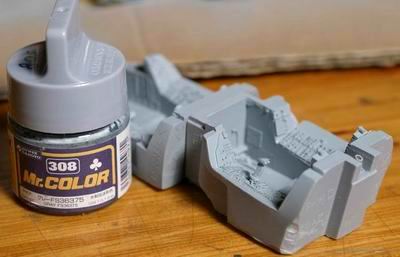 |
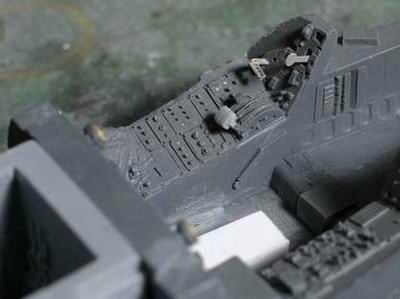
ここまでできたら、塗装の開始。まずは308を全体にエアーブラシ。後からのウオッシングにも強いのでラッカー系がお勧め。 Once we've reached this stage, I spray Creous Mr. Color 308(FS36375) overall. Lacquer paint is tough enough for subsequent application of a wash. For the wash I use thinned flat black enamel (ratio is 1:10) which dose not corrode Creous' lacquer paint. |
 |
マスキングにはテープとマスキング材を併用。黒い部分にアクリル系つや消し黒でエアーブラシ。 I used masking tape and masking sol in conbination for masking. I sprayed black parts using acrylic flat black. |
 |
コックピットのメーターシートは裏を白く塗る。 I painted the back side of the etched instrument sheet acrylic white. |
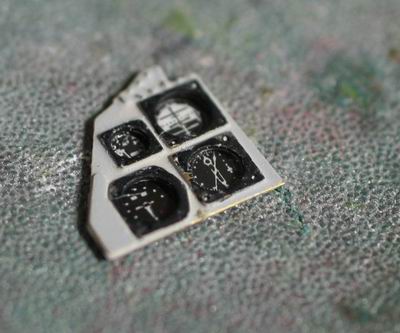 |
いい感じだ。 Very nice! I painted these black frames with enamel flat black. |
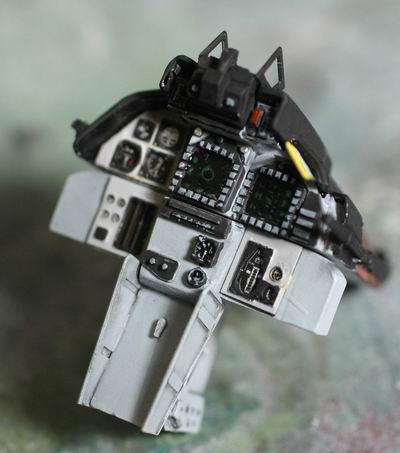 |
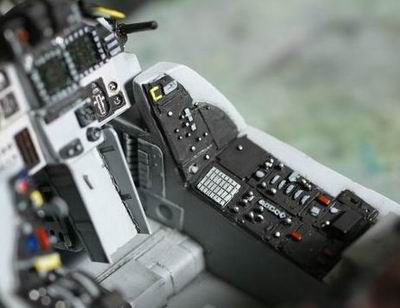
パイロット席。実機の写真を見ながら細部の塗り分けを行う。細部塗装にはエナメル系が良い。レーダースクリーンはアクリルの光沢の黒が乾いてから、エナメルの緑で光点などを書き入れる。 Here are the pilot cockpit consoles. The details are painted with enamel gray, yellow and red. I referred to actual cockpit photos for this I put some drops of acrylic clear into the radar screen and then draw green patterns in enamel green. |
 |
塗装の順番は 1.ラッカー系グレーをエアーブラシ 2.10対1にうすめたエナメル黒でウオッシング 3.エナメル溶剤をしみこませた綿棒でふき取る 4.エナメル系黒で計器まわりを筆塗り。自信があれば、アクリル系がお勧め。 5.エナメル系赤や黄色、銀などで細部塗装 6.フラットスプレーコート 7.ガラス部分にクリアエナメルを流し込み。エナメルグリーンでレーダーパターンを書き込む 8.エナメル系グレーでドライブラシ Painting cockpit basic 1. Spray lacquer gray 2. Wash with 1:10 thinned enamel flat black. 3. Remove excess enamel with cotton swab dipped in enamel thinner. 4. Paint black panels with enamel flat black. If you are an expert, I recommend using acrylic paint instead of enamel. 5. Paint gray, red and yellow and parts with enamel. 6. Spray water-based flat coat 7. Put clear enamel for the radar screen. Draw patterns with enamel green. 8. Dry-brush with enamel gray |
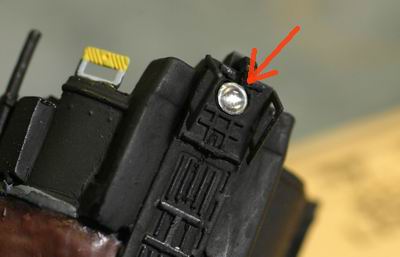 |
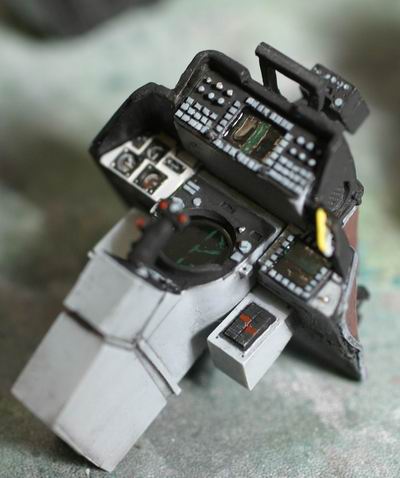
投影レンズには鉄道模型用のレンズをはめこむ。 I put a model railroad "LV" lens in as the projector lens. |
 |
銀色の筆入れの前につや消しスプレーをすると落ち着く。ただし計器などにクリアーパーツを使っている時は計器を貼る前にスプレー。 I painted silver parts after flat coating. You also need to take care not to spray flat coat over clear parts. |
 |
ウオッシング効果がてき面に出た。 Nice Wash effect! |
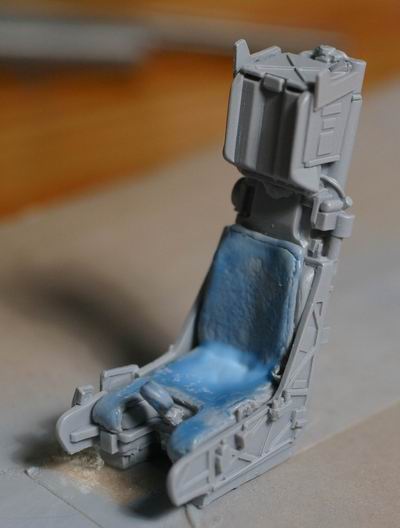 |
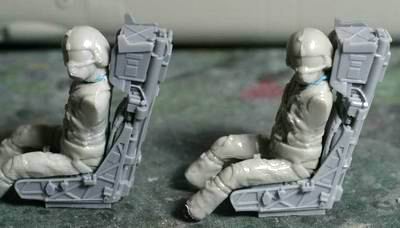
シートは、レジンプライマー後に、まずクッション部分をマスクして、アクリル系つや消し黒をエアーブラシ。シートとコックピットカバーにアクリルを選んだ訳は、アクリルはフラットフィニッシュに最適であるからである。ちなみにエナメルはグロスフィニッシュに向いている。 After resin priming, I masked the cushions and sprayed acrylic flat black. I choose acrylic paint for seat and cockpit cover because acrylic paint is best for flat finish and wash is not needed for all flat black parts. On the other hand, enamel is best for gloss finish. |
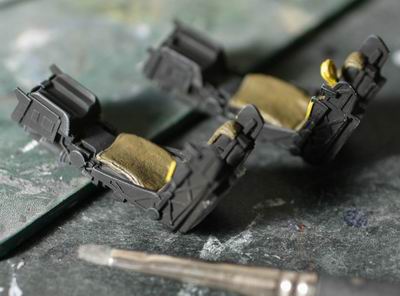 |
エアークッション部にカーキを筆塗り。乾燥後にエナメル黒でウオッシング。余計なエナメルをふき取った後、つや消しスプレー。 I painted the cushions khaki and then washed only cushions with enamel black. After removing excess enamel, I sprayed flat coat. |
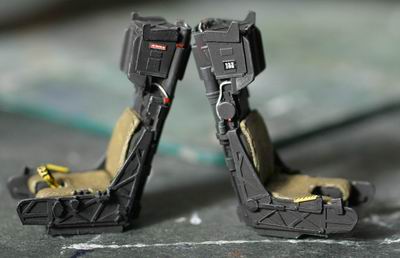 |
実物の写真を参考にエナメル系赤や銀などを配色。ハセガワのウエポンセットなどに入っているデカール流用し、注意パネルなどを貼る。そして最後にエナメルの銀でかるくドライブラシする。 Referring to actual seat photos, I painted details in enamel silver, red and yellow. I also used some decals from Hasegawa's 1/48 weapon set. Finally I dry-brushed with enamel silver. |