 |
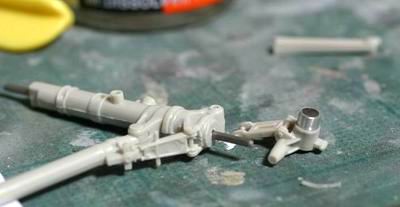
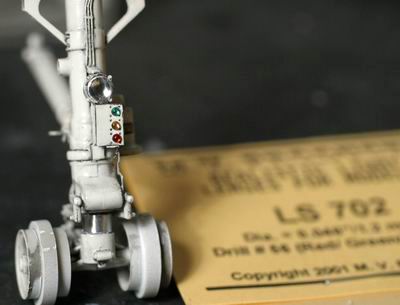
発艦直前は前傾姿勢をとるため、前車軸が縮む。車軸部分をカットして代わりに短いアルミパイプを挿入した。 When Tomcats are put on the catapult, she sets her nose down by pushing the front gear struts up. Cut silver axis part and replace it with short aluminum pipe. |
 |
車軸の配線にはエデュアルドのエッチングセットとリード線をほぐした銅線を併用する。ちなみにエデュアルドのエッチングセットは片側しかない部品がある。欠陥品だと思うが、、 Put Eduard's etched wiring on the struts. But there are missing parts in the set. It's defective (No left side parts)! You need to add them yourself with copper wires. |
 |
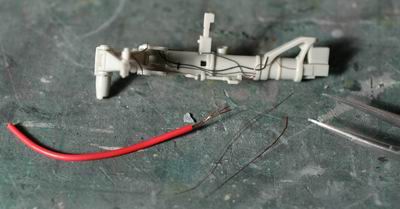
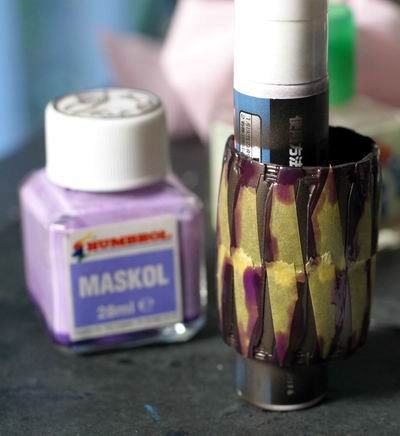
照明は、この段階ではキット付属の透明パーツを使い、マスキングゾルで塗装がかぶらないようにしているが、結局、透明パーツは削り取り、鉄道模型用のレンズを後からはめ込んだ。 エッチングはエデュアルドのもの。 At this time, I put the original clear part for the light (under masking-sol in the photo). I eventually switched this clear part with a railroad model lens. |
 |
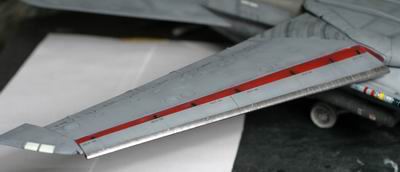
配線のディテールアップ状況。 I should use thicker wires. |
 |
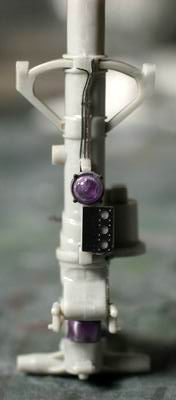
塗装は、まず白のサーフェサーを吹き、次にMr.カラーのホワイトを吹き、エナメル黒でウォッシングする。照明はいずれも鉄道模型用のレンズをはめ込んだ。 For painting, spray white primer first, then spray Mr. Color white and then apply wash. These four lenses came from "LV lens" from a railroad modeling manufacturer. |
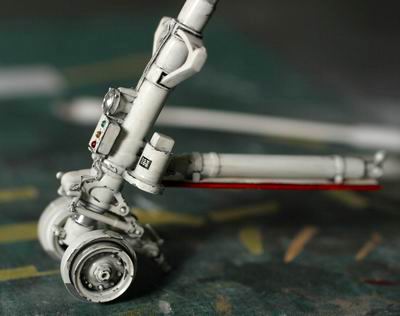 |
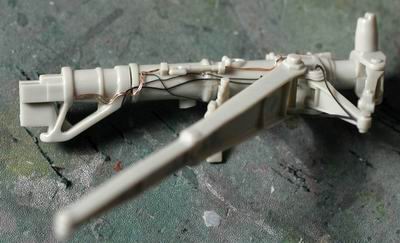
ハセガワの1/48ウエポンセットからデカールを流用している。ちなみに車軸の銀部分はモデルマスターズ社製のクロームシルバーを筆塗りしている。 I used the decals from the 1/48 Hasegawa weapon sets. I painted Model Master Chrome Silver for the axis. |
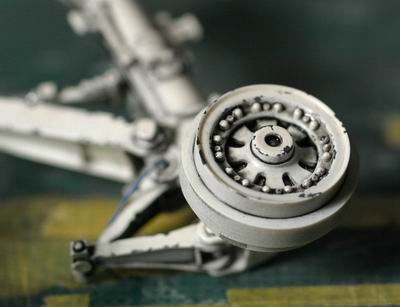 |
エナメルのジャーマングレイでチッピングを入れていく。エナメルだから失敗したらエナメルシンナーでふき取れば良い。 Paint "chip" with German gray enamel. You can easily remove it if you don't like it with enamel thinner. |
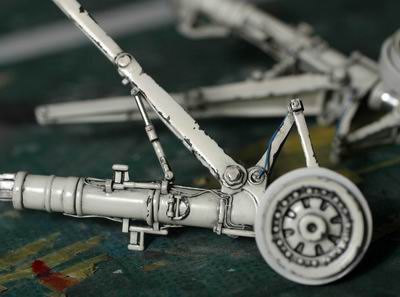 |
こんな感じか。 Finished |
 |
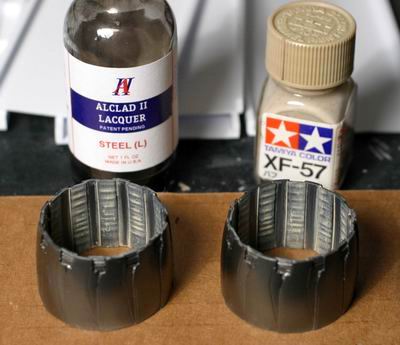
エンジンノズルはDタイプに換装。Teknicsのレジン製。まず、全体にレジン用プライマ-をスプレイ、外側はアルクラッドのダークアルミとカッパー、ゴールドなどを混ぜたものを吹き付ける。1時間後、重なり部分にスチールを吹く。マスキングはテープとゾルを併用した。 This is Teknics resin nozzle. Spray resin primer first. Mix Alclad dark aluminum, copper and gold. Spray it on the outside of the nozzle. After one hour, mask the fin with tape and masking sol and then spray Alclad steel in between. |
 |
内側はまず、アルクラッドのスチールを吹く。1時間後にエナメルバフでドライブラシ。綿棒にエナメルシンナーを浸し、余分なバフをふき取る。 For inside nozzle, spray Alclar steel. After one hour, dry-brush with Buff enamel. Remove excess enamel with cotton swab dipped in enamel thinner. |
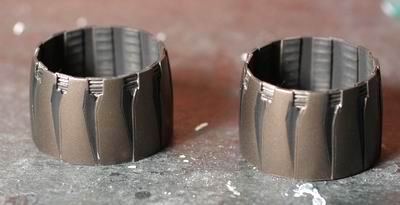 |
アルクラッドスチールをうっすらと吹きかける。 Spray Alclad steel again. |
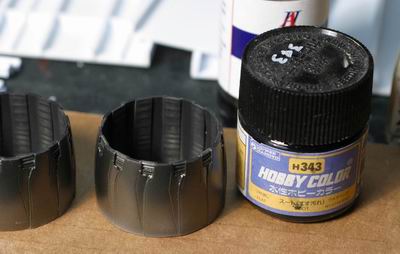 |
最後はMr.カラーのすすを吹いて完了。 Finally, spray Mr. Hobby soot. |
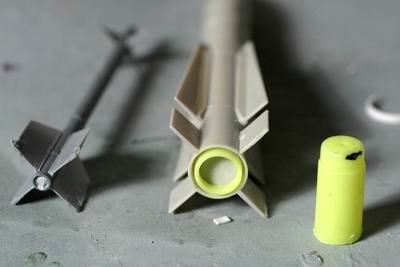 |
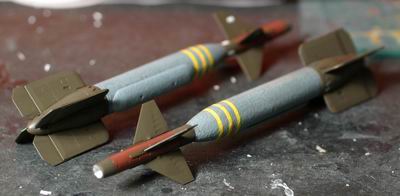
ミサイルのお尻はよく目立つのでちゃんと処理しよう。接着面をパテで埋めサンドし見えなくする。フェニックスには蛍光ペンのキャップを少し輪切りにして貼り付けた。 Missile's butt is very visible. Detail up these area. Remove parting line with putty and sanding. I put a sliced cap on the Phoenix. |
 |
塗装方法はF-15Eの作り方の記事を参考に。 Please refer to the article of the F-15E for painting missiles. |
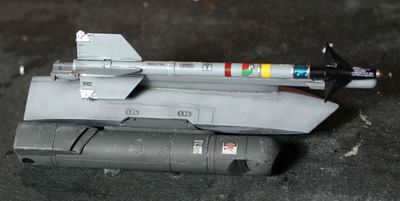 |
Lantirnポッドにはエナメルジャーマングレイでチッピングを施した。 I applied "chipping" to the Lantirn pod with German gray enamel. |
 |
ペーブウエイの胴体は滑り止めが塗られている。クレオスの溶きパテをドライブラシでたたきつける。 Tap Mr. Dissolved Putty to the surface of the Paveway. Is it anti-slip coating? "the bombs loaded on USN carriers are coated with a fire retardant material to help prevent the bombs "cooking off" in the event of a ship board fire and this coating gives USN bombs their rough finish" by Richard from England. |
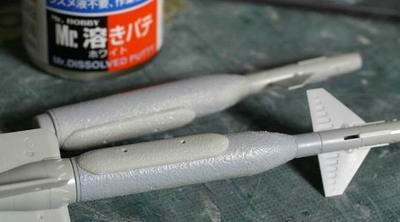 |
乾燥後、サンドペーパーで少し均すとよい。 After drying, level surface with a little bit of sanding. |
 |
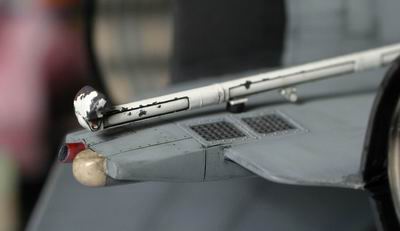
塗装終了。頭部には鉄道模型用レンズをはめ込んでいる。 Put "LV" lenses on the head. |
 |
シルバーがよいポイントになる。モデルマスターズのクロームシルバー。 Paint Master Modeler's chrome silver to the silver parts. It's a nice accent, isn't it? |
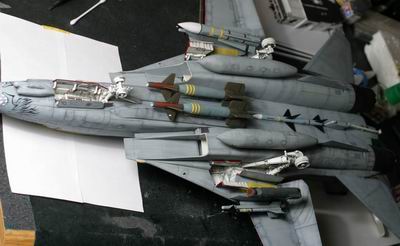 |
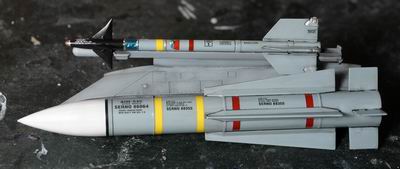
VF-213部隊のクルーに直接聞いた話だが、このタミヤの兵装指示の組み合わせは誤りではないが、スパローをこの組み合わせで併用することはあまりないとのコメントをもらった。 I heard from a VF-213 crewman that this Tamiya's instruction for weapon arrangement is correct, however, the Sparrow is unusual for this combination. |
 |
着艦フックもエナメルジャーマングレイでチッピングを入れた。 Apply "chipping" to the hook with German gray enamel. |
 |
あとは、ライトのインストール。 Installing the lights. To be continued. |